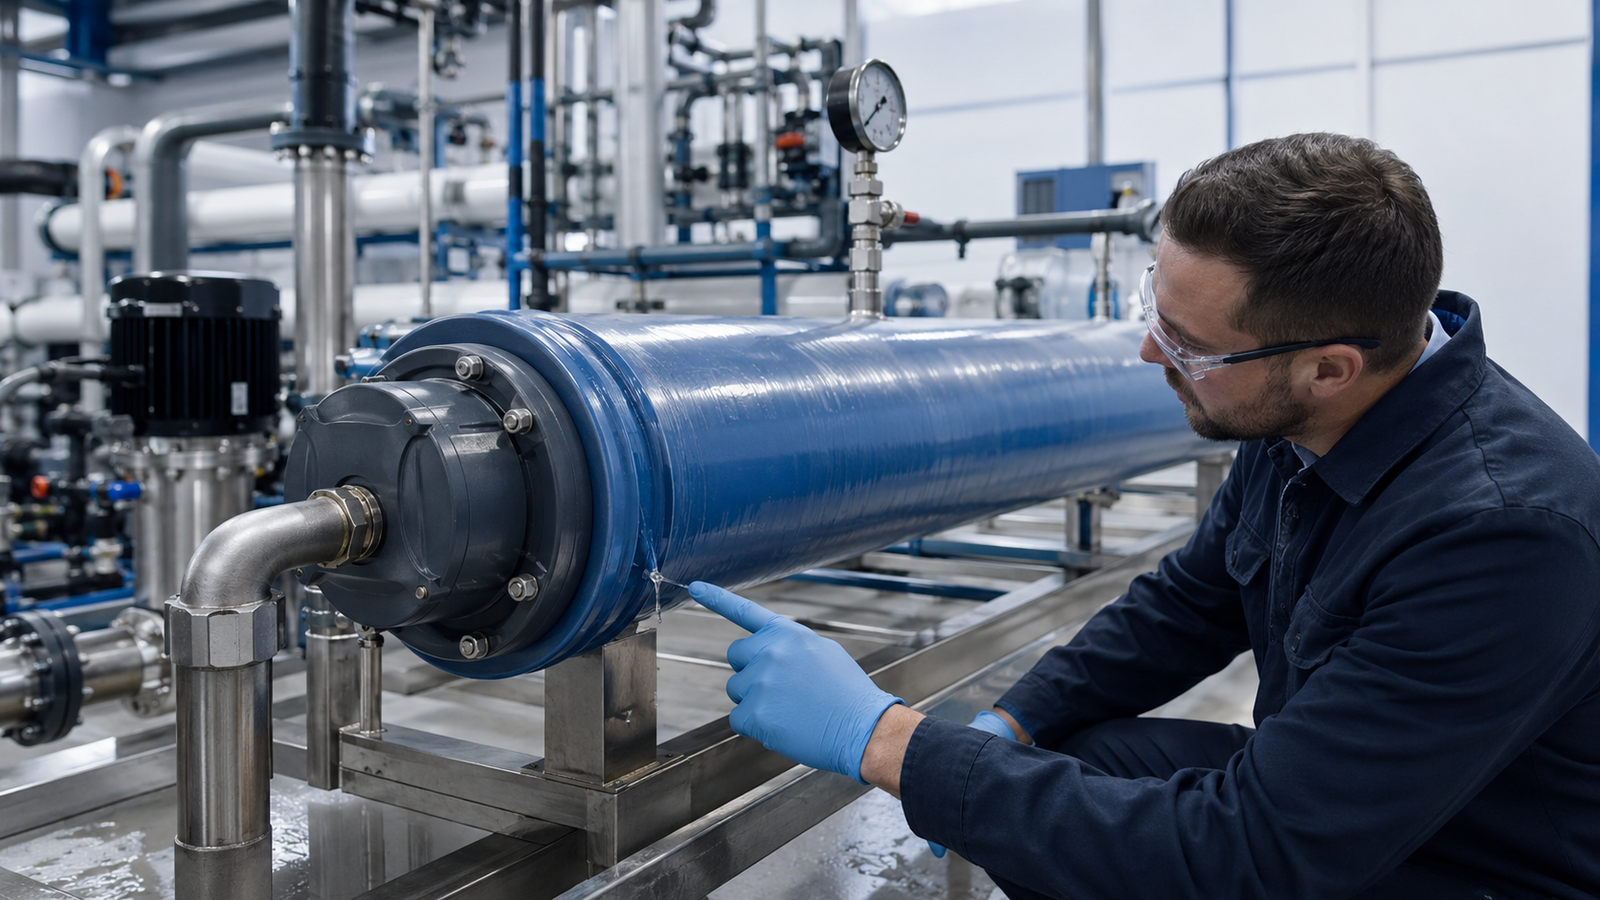
A leaking RO membrane housing can cause water loss unstable system pressure reduced permeate quality equipment shutdown and additional maintenance costs. However a leak does not always mean that the FRP pressure vessel itself is defective.
The cause may be as simple as a damaged O ring or as serious as shell damage incorrect pressure selection or improper installation. Before replacing the complete membrane housing it is important to identify exactly where the water is coming from and why the seal has failed.
IMAGE PLACEHOLDER 1 RO membrane housing leakage overview
Safety Comes First
An RO membrane housing is a pressure vessel. Never open tighten adjust or remove any part while the housing is pressurized.
- Stop the high pressure pump
- Shut off the feed water supply
- Isolate the membrane vessel from the system
- Open the appropriate valve to release internal pressure
- Confirm that the pressure gauge has returned to zero
- Wait until the vessel is completely depressurized
- Allow only trained personnel to open or repair the housing
Incorrect disassembly of a pressurized vessel may cause the end closure to be released with great force resulting in serious injury and equipment damage.
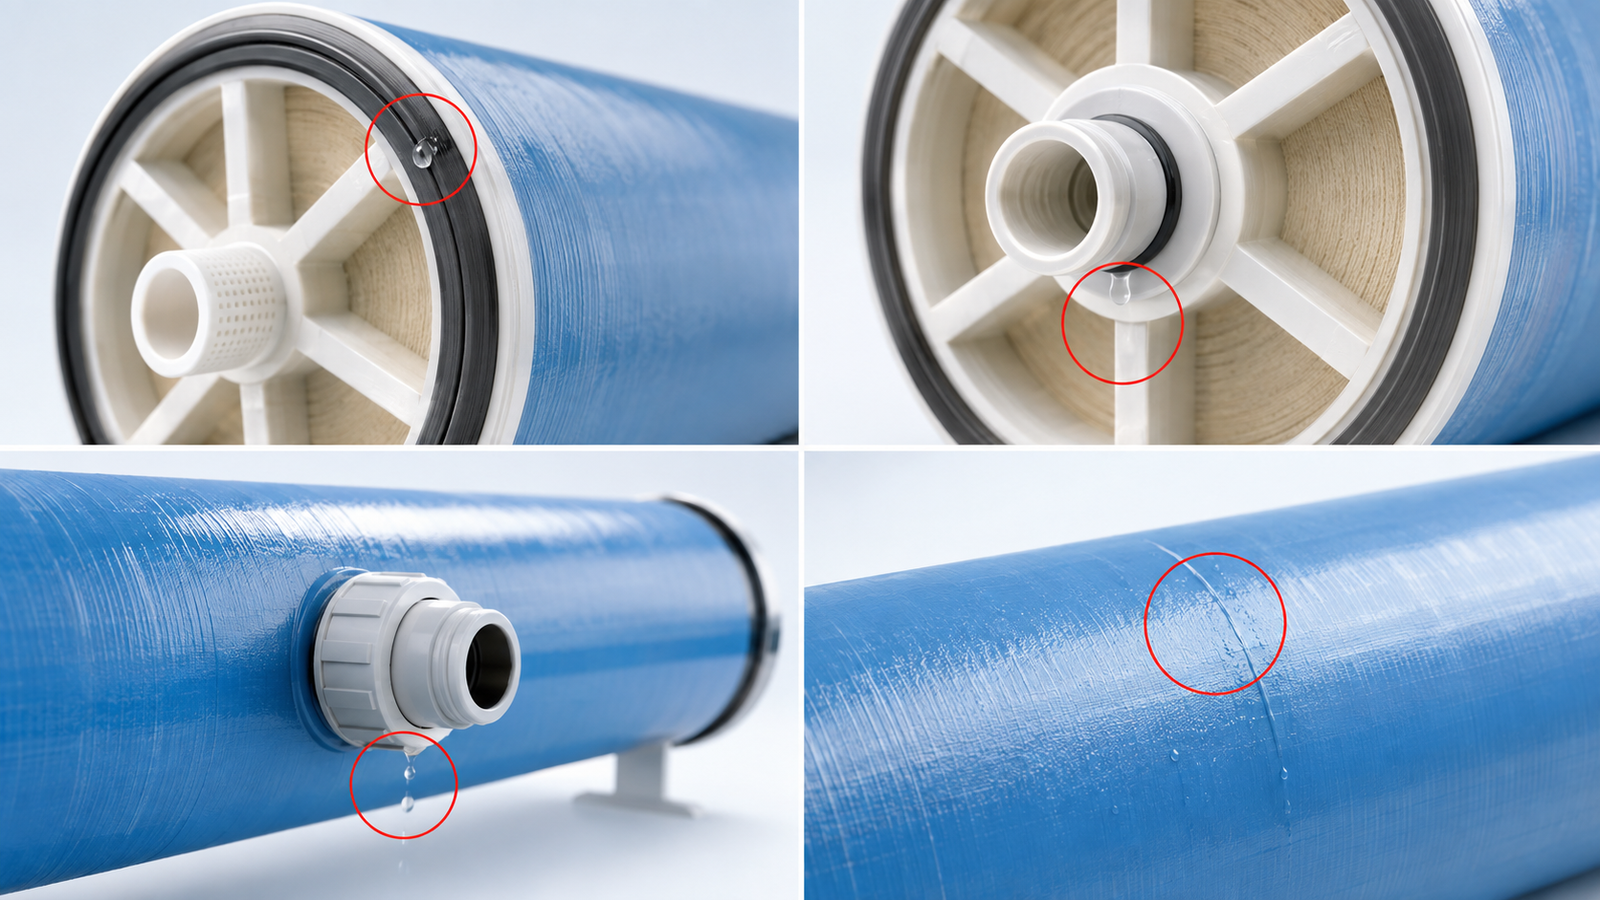
First Identify the Location of the Leak
| Leak Sign | Likely Cause | First Check |
|---|---|---|
| Water around the end closure | Damaged head seal or O ring | Depressurize and inspect the seal and groove |
| Water around the permeate outlet | Port seal adapter or alignment problem | Inspect the permeate seal and connector |
| Water around the feed or concentrate port | Damaged gasket loose coupling or pipe stress | Check the coupling seal and piping support |
| Water coming through the FRP shell | Scratch impact chemical attack or overpressure | Remove the vessel from service for evaluation |
| Higher permeate TDS without an external leak | Internal O ring adapter or interconnector failure | Inspect internal seals and membrane alignment |
IMAGE PLACEHOLDER 2 Common RO membrane housing leak locations
1 Damaged or Incorrectly Installed O Ring
The end closure O ring is one of the most common sources of leakage.
An O ring may fail because it is
- Cut or scratched during installation
- Twisted inside the sealing groove
- Flattened after long term use
- Hardened by age temperature or chemicals
- Covered with dirt sand or scale
- Installed in the wrong position
- The wrong size or material
- Reused after it has already been damaged
Even a small particle inside the sealing groove can prevent the O ring from making full contact with the vessel wall.
Recommended Solution
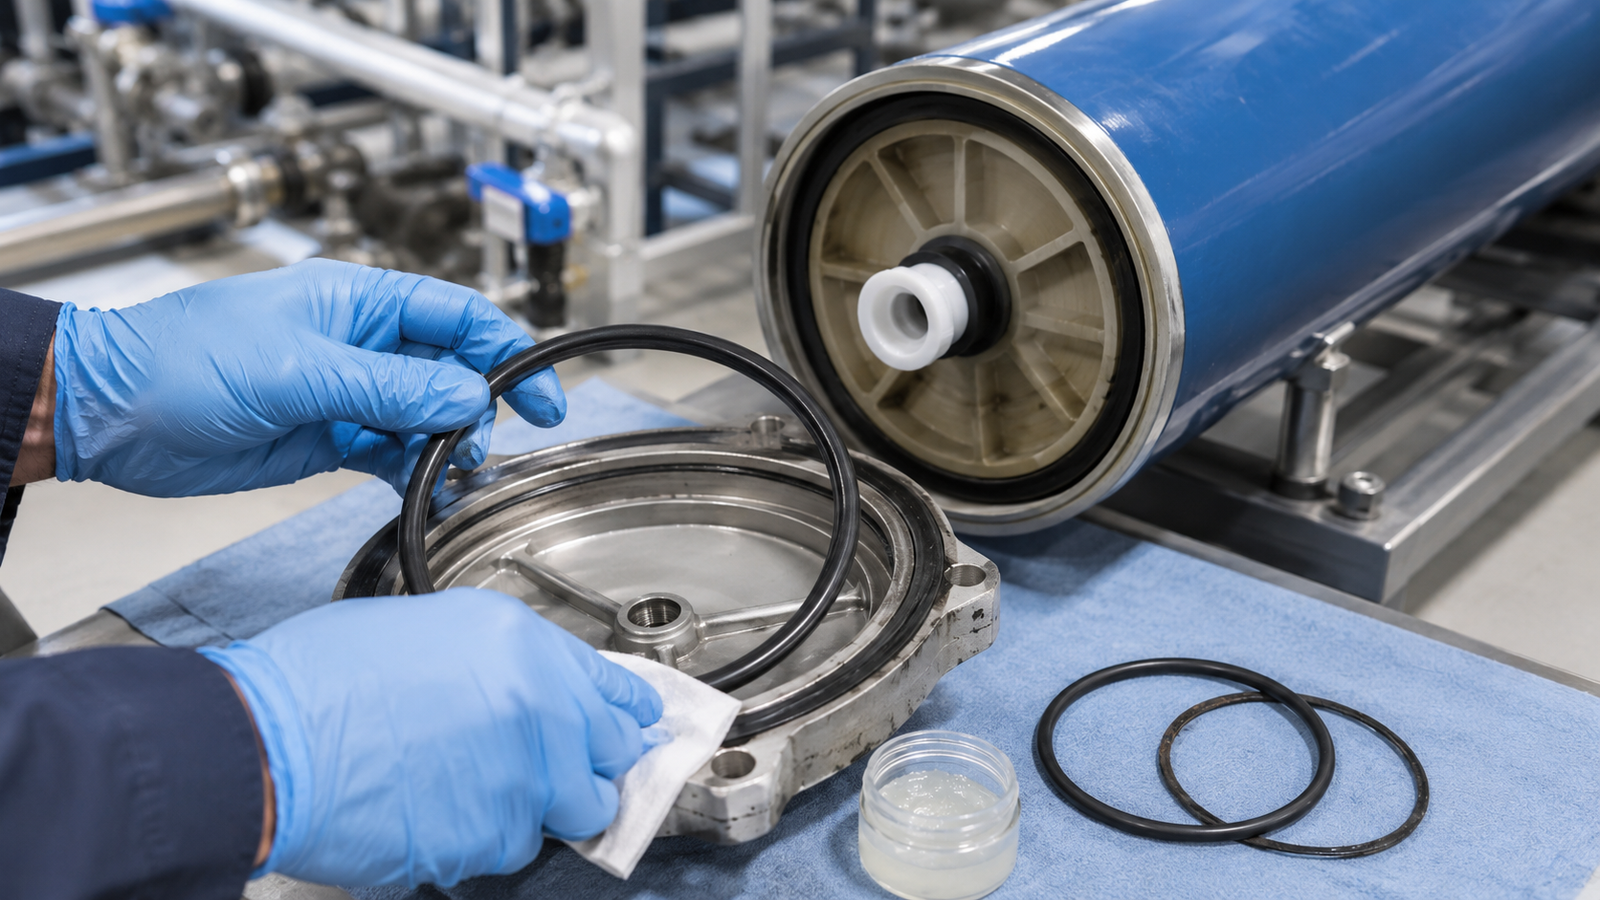
Remove the O ring only after the vessel is fully depressurized. Clean the O ring groove head assembly and internal sealing surface with clean water and a soft cloth.
Inspect the O ring carefully. Replace it if it has cuts cracks deformation loss of elasticity or a flattened surface.
Apply a thin even layer of manufacturer approved O ring lubricant. Do not use random petroleum grease because it may damage the seal contaminate the membrane or affect drinking water applications.
Install the O ring evenly without twisting it.
IMAGE PLACEHOLDER 3 RO membrane housing O ring inspection
2 Dirty or Damaged Sealing Surface
A new O ring may still leak if the sealing surface is dirty scratched or damaged.
Common contaminants include
- Sand and sediment
- Membrane preservation chemicals
- Scale deposits
- Old lubricant
- Rust from surrounding metal parts
- Small plastic or fiberglass particles
Scratches on the head seal area can create a path for water to pass around the O ring.
Recommended Solution
Clean the seal area completely and inspect it under good lighting. Minor dirt can normally be removed but deep scratches cracks or structural damage require professional evaluation.
Never grind drill patch or repair an FRP pressure vessel shell without written instructions from the original vessel supplier.
3 Incorrect End Cap Installation
The end cap must enter the vessel squarely and reach the correct position. If it is tilted or not fully inserted the O ring may be compressed unevenly.
- The locking ring is not completely seated
- The retaining components are installed in the wrong order
- Dirt remains inside the locking groove
- The end cap is forced into position
- Internal parts do not match the housing model
- The head assembly has been damaged by improper tools
An incorrectly installed locking system is more than a leakage problem. It can create a serious pressure vessel safety risk.
Recommended Solution
Remove the head assembly after releasing all pressure. Clean the locking groove and inspect every retaining component.
Reinstall the head in line with the vessel axis. Confirm that the locking ring and all retaining parts are fully seated according to the housing manufacturer’s instructions before restarting the system.
4 Permeate Port Seal Leakage
If water appears around the central product water outlet the problem may be the permeate port seal rather than the main head O ring.
Possible causes include
- Damaged permeate port O ring
- Scratched sealing surface
- Loose port nut
- Incorrect connector size
- Excessive tightening
- Side force from unsupported piping
- Incorrect membrane adapter
- Poor alignment between the membrane and permeate port
Recommended Solution
Inspect the permeate port seal and sealing surface. Replace damaged seals and connectors with parts that match the exact housing model.
Reconnect the permeate pipe without forcing it into position. The pipe should not pull push or twist the permeate port.
Avoid excessive tightening. More force does not always produce a better seal and may damage threads seals or plastic components.
5 Feed or Concentrate Port Leakage
Side ported FRP membrane housings may leak around the feed or concentrate connection.
Typical causes include
- Damaged side port seal
- Loose coupling or connector
- Incorrect gasket size
- Misaligned manifold piping
- Excessive pipe weight
- Vibration from the high pressure pump
- Thermal expansion of rigid piping
- Impact during transportation
- Corrosion or damage to metal connection parts
The FRP vessel should not be used to support the weight of the piping system.
Recommended Solution
Check the coupling gasket side port connection and surrounding parts. Confirm that the pipe and vessel are properly aligned and independently supported.
Do not pull the pipe into position by tightening the coupling. Correct the piping support and alignment first.
If the side port or vessel connection is visibly damaged remove the housing from service and contact the supplier.
6 Incorrect Membrane Adapter or Interconnector
Leakage may occur inside the vessel even when no water is visible outside.
Internal seal failure can allow feed water to mix with permeate water causing
- Higher permeate conductivity
- Increased permeate TDS
- Unstable product water quality
- Reduced salt rejection
- Unexpected changes after startup
- Poor performance even when the membrane elements appear normal
Possible causes include damaged adapter O rings incorrect interconnectors missing seals poor membrane alignment or movement of the membrane column.
Recommended Solution
After safely opening the vessel inspect
- Membrane element interconnectors
- Adapter seals
- Product water tube O rings
- Membrane element positioning
- Thrust ring or thrust cone
- Spacer quantity and position
Use only compatible adapters and seals. Parts that look similar may have different dimensions and may not seal correctly.
7 Membrane Movement During Startup and Shutdown
Rapid pressurization can push the membrane elements inside the pressure vessel. Repeated movement may damage adapter seals and internal O rings.
This problem is more common when
- The high pressure pump starts immediately at full pressure
- The system starts and stops frequently
- There is no controlled pressure increase
- The membrane column has excessive free space
- Spacers have not been installed correctly
- The thrust device is missing or incorrectly positioned
The result may be an internal bypass sudden decline in permeate quality or damaged seals.
Recommended Solution
Increase system pressure gradually during startup and reduce it gradually during shutdown.
Check the membrane loading procedure and install the correct spacers according to the vessel manufacturer’s instructions. Proper shimming helps reduce movement of the membrane column and protects internal seals.
8 Excessive Operating Pressure
Every RO membrane housing has a maximum design pressure. Using a housing below the required pressure rating can cause seal failure port leakage or structural damage.
For example commercial brackish water and seawater RO systems may require very different pressure ratings. A housing suitable for a low pressure commercial system must not automatically be used in a high pressure seawater system.
Pressure can exceed the expected level because of
- Incorrect pump selection
- Closed concentrate valve
- Blocked pipeline
- Incorrect pressure control
- Faulty pressure switch
- Sudden valve operation
- Water hammer
- Instrument calibration errors
- Membrane or filter blockage
Recommended Solution
Compare the actual system pressure with the vessel nameplate and technical data.
Check the pressure gauge safety valve pressure switch concentrate valve and pump settings. The vessel pressure rating should always provide a suitable safety margin for the real operating conditions.
Never continue operating a vessel that has experienced serious overpressure until it has been inspected by qualified personnel.
9 Water Hammer and Pressure Surges
A system may normally operate below the maximum pressure but still experience short pressure surges.
Water hammer may occur when
- A valve closes too quickly
- The pump starts suddenly
- Flow direction changes rapidly
- Air remains trapped in the pipeline
- The system has an unsuitable control sequence
These short pressure shocks can damage seals couplings ports and internal components.
Recommended Solution
Use a controlled startup procedure and open valves slowly. Remove trapped air from the system and inspect the control sequence.
Variable frequency drives soft start controls pressure relief devices and suitable piping design may help reduce pressure surges depending on the system.
10 Incorrect Housing Model or Pressure Rating
A 4040 membrane housing and an 8040 membrane housing are designed for different membrane diameters. The number of membrane elements port arrangement operating pressure and connection size must also match the system.
A common purchasing mistake is choosing only by appearance or price.
Before ordering confirm
- Membrane diameter
- Membrane length
- Number of membrane elements
- Required working pressure
- Side port or end port configuration
- Feed and concentrate port size
- Permeate port connection
- Raw water type
- Operating temperature
- Required seal material
Incorrect selection may lead to difficult installation leakage and premature failure.
11 Unsupported or Misaligned Piping
Rigid piping can transfer mechanical force directly to the membrane housing.
The vessel may be pulled sideways when
- The pipe length is incorrect
- Pipe supports are missing
- The manifold is not level
- Connections are forced together
- Heavy valves are installed without support
- Thermal expansion has not been considered
This force may distort connections damage seals or create repeated leakage.
Recommended Solution
Support the piping independently. Align the pipes before connecting them to the vessel. Flexible connections may be appropriate in some systems but must meet the pressure and material requirements of the application.
The membrane housing should never act as a structural support for pipes valves or manifolds.
12 Incorrect Mounting and Clamping
FRP pressure vessels expand slightly during pressurization. If the vessel is clamped too tightly it may not move normally.
Problems may occur when
- Metal clamps are overtightened
- Incorrect support saddles are used
- The vessel directly contacts sharp metal surfaces
- The shell is scratched during installation
- The vessel cannot expand or contract
- The frame becomes distorted
Recommended Solution
Use the mounting hardware recommended for the vessel. Do not overtighten clamps and do not drill into the FRP shell.
Protect the vessel from sharp objects welding sparks impact and abrasion during installation and maintenance.
13 Chemical or Temperature Incompatibility
The FRP shell seals ports and internal parts must be compatible with the feed water cleaning chemicals and operating temperature.
Leakage may develop when seals are exposed to unsuitable chemicals or excessive temperature.
Potential risks include
- Strong oxidizing chemicals
- Incorrect cleaning solution concentration
- Unsuitable solvents
- High temperature cleaning water
- Long chemical soaking periods
- Seal materials that do not match the application
Recommended Solution
Check the chemical compatibility of the vessel and seal materials before cleaning or disinfection.
Follow the membrane and pressure vessel supplier’s limits for pH temperature chemical concentration and exposure time.
14 Transportation or Handling Damage
A membrane housing may be damaged before installation.
Transportation damage can include
- Shell scratches
- Impact marks
- Cracked ports
- Bent metal components
- Damaged threads
- Missing locking parts
- Deformed O rings
- Dirt entering the open vessel
Recommended Solution
Inspect the packaging before unloading and examine every vessel before installation.
Record any damage with photos and keep the product label serial number and packaging information. Do not pressurize a vessel with visible structural damage.
15 Normal Seal Aging and Poor Maintenance
Seals do not last forever. Their service life depends on pressure temperature water quality chemicals operating cycles and maintenance practices.
Signs of an aging seal include
- Flattening
- Hardening
- Cracks
- Loss of elasticity
- Surface wear
- Repeated leakage after repositioning
Recommended Solution
Include O rings adapter seals and port seals in the preventive maintenance plan. Keep compatible seal kits in stock especially for systems that must operate continuously.
Replacing a worn seal during planned maintenance is usually less expensive than stopping the complete RO system unexpectedly.
Step by Step Leakage Inspection
Step 1 Record the Operating Conditions
Record the operating pressure feed pressure concentrate pressure temperature flow and the time when the leakage started.
Determine whether the problem appeared during startup normal operation cleaning or shutdown.
Step 2 Clean and Dry the Surface
Water can travel along the outside of the vessel and make the leak appear far from its real source.
Clean and dry the housing before observing the leak location.
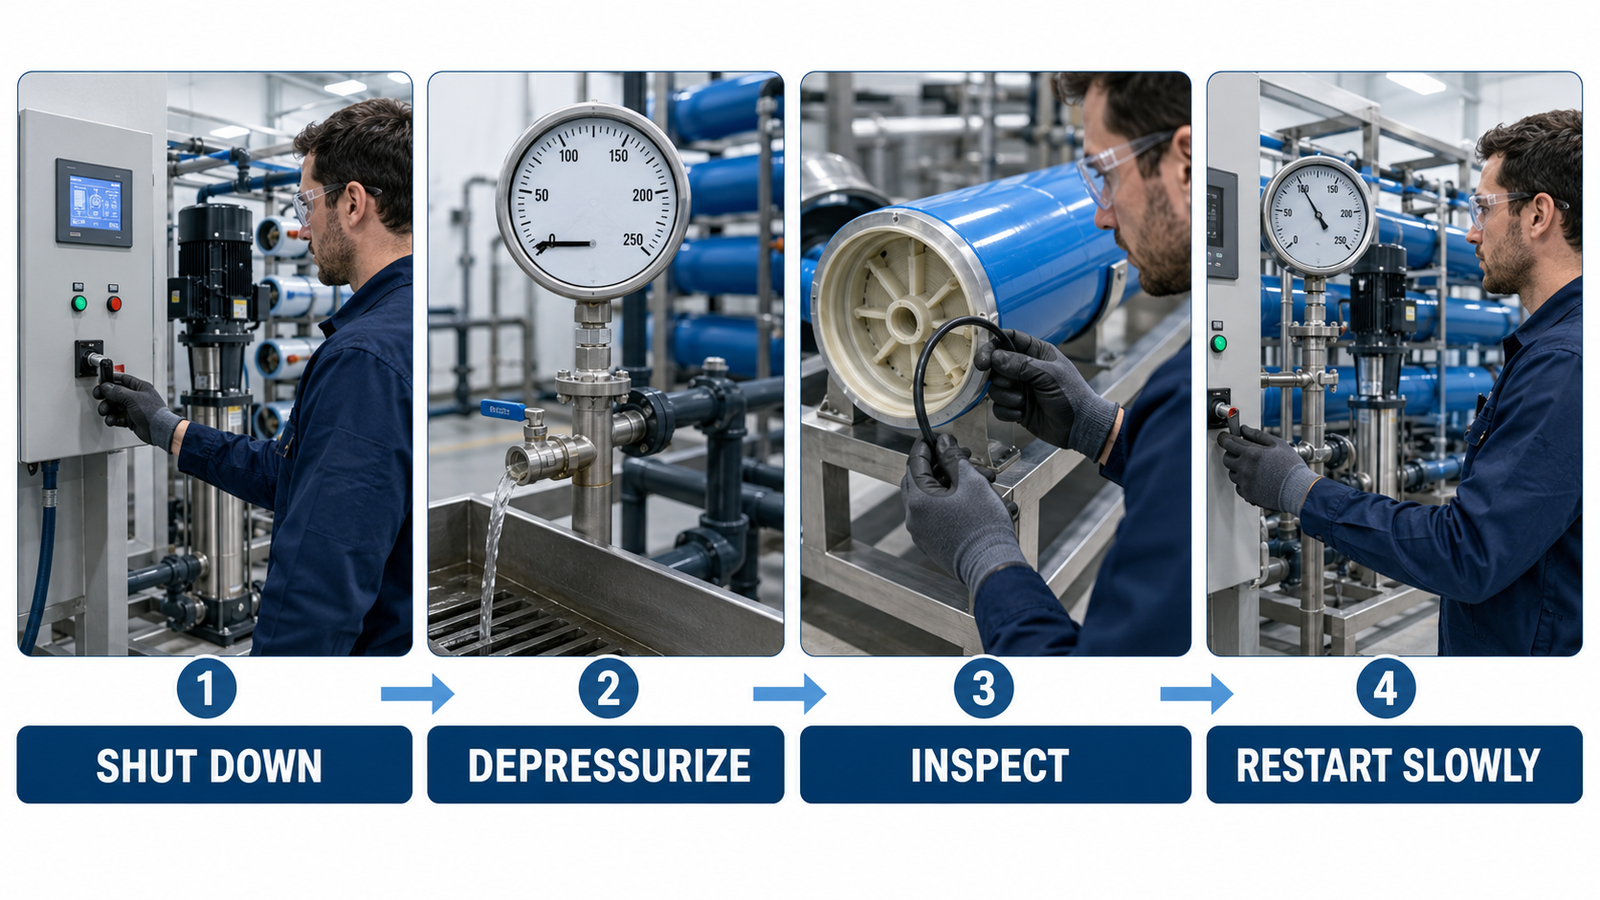
Step 3 Shut Down and Release Pressure
Stop the pump isolate the vessel and confirm zero pressure before touching any closure coupling or port.
Step 4 Inspect the Most Likely Components
Check the head seal permeate port feed port concentrate port coupling piping support and shell condition.
Step 5 Replace Damaged Seals
Use the correct seal material and dimensions. Clean the grooves and apply approved lubricant before installation.
Step 6 Confirm Assembly and Alignment
Make sure the end closure is square the locking mechanism is fully seated and the piping does not apply side force.
Step 7 Restart Slowly
Gradually introduce water remove trapped air and increase pressure slowly. Observe all connections at low pressure before reaching the normal operating pressure.
Step 8 Monitor the System
Check for external leakage pressure changes and permeate conductivity. Record the repair and replaced parts for future maintenance.
IMAGE PLACEHOLDER 4 Safe troubleshooting process
When Should the Complete Housing Be Replaced
Replace or professionally evaluate the membrane housing when
- The FRP shell is cracked or deeply scratched
- Fiberglass fibers are exposed or damaged
- Water passes through the shell
- The feed or concentrate port is structurally damaged
- The locking groove is damaged
- The vessel has experienced severe impact
- The vessel has been seriously overpressurized
- Leakage continues after correct seal replacement
- The product label or pressure rating cannot be confirmed
- The housing is not suitable for the required operating pressure
Never attempt to repair the structural FRP shell with glue resin tape welding or an improvised patch.
How to Prevent Future Leakage
Most leakage problems can be reduced through correct selection installation and maintenance.
Recommended preventive measures include
- Select the correct 4040 or 8040 housing
- Confirm the required pressure rating
- Use compatible seals adapters and connectors
- Inspect O rings before assembly
- Keep sealing grooves clean
- Apply approved lubricant correctly
- Support and align all piping
- Use the correct vessel mounting hardware
- Increase pressure gradually during startup
- Reduce membrane movement with correct spacers
- Monitor operating pressure and pressure surges
- Protect the shell during transportation and installation
- Keep spare seal kits available
- Train maintenance personnel
- Record installation and maintenance information
Information to Provide When Requesting Technical Support
Provide the housing model membrane size element quantity pressure rating port design operating pressure feed water TDS temperature leak location photos installation date seal history and pressure records. This information helps distinguish a seal problem from installation operating or vessel damage.
Conclusion
RO membrane housing leakage should be treated as both a maintenance issue and a pressure vessel safety issue.
The most common causes include damaged O rings dirty sealing grooves incorrect end cap installation permeate port seal failure side port misalignment excessive operating pressure water hammer membrane movement and unsupported piping.
Always shut down isolate and completely depressurize the vessel before inspection. Replace damaged seals with compatible parts clean and lubricate sealing surfaces correctly confirm that the locking system is fully seated and restart the system gradually.
If the FRP shell port or locking structure is damaged remove the vessel from service and contact a qualified supplier. Correct product selection careful installation and preventive maintenance can significantly reduce leakage unexpected shutdowns and replacement costs.